Our Geoserver setup is now working locally, we use OpenLayers to connect to Geoserver on http://localhost:8081/geoserver, and it is working correctly. However, this setup is not optimal for two main reasons:
- When we deploy to production, we will have two applications with two different ports. What will we do? Use two domains (i.e., www.mydomain.com and www.mygeoserverdomain.com) or subdomains (i.e., www.mydomain.com and geoserver.mydomain.com)? It would be a possible solution, but with WFS, we will run into CORS issues. CORS or Cross-Origin Resource Sharing is a protection mechanism used by browsers and web servers to prevent javascript from loading resources from different domains that aren't the script's origin. It is precisely what OpenLayers (javascript), originating from the domain www.mydomain.com does; it's making a query on the WFS service to load a json resource on a different origin: www.mygeoserverdomain.com. There are two possible solutions to this problem; the first is to configure the server to explicitly allow requests from specific origins (Geoserver supports this setting). The second is to have everything within the same domain (origin). It is the one we will achieve with Nginx reverse proxy.
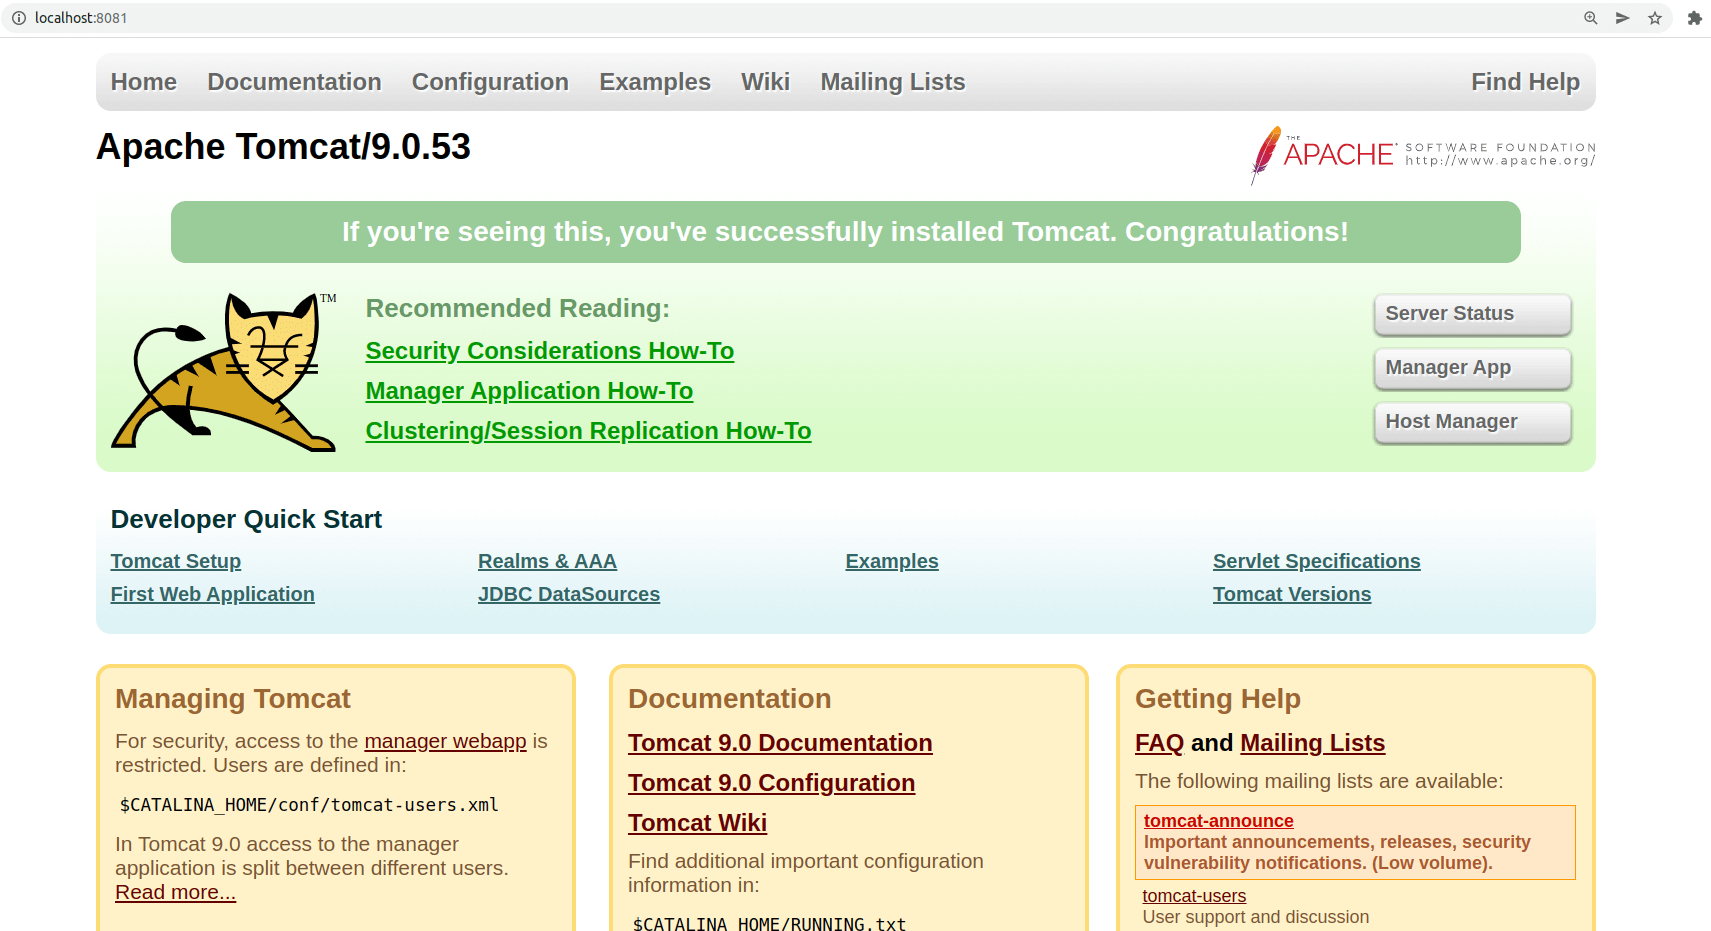
- The second reason is that our setup is not safe at this moment. Geoserver is a Java application deployed using the Apache Tomcat framework (in our setup). The Tomcat application has an administrative control panel that we do not want to be publicly accessible. At this time, it is available at http://localhost:8081:
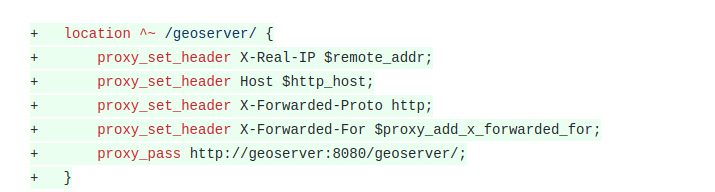
 Let's use our existing proxy service to reverse proxy everything coming on http://localhost:8080/geoserver to our Geoserver service (named "geoserver" in the docker-compose.yml file) on the same directory. To do so, we will need first to run "docker-compose down" to make sure our containers are not running, then make the following changes to docker/nginx/nginx-site.conf:
server {
    listen 80;
    root /var/www/app/public;
    index index.php;
    server_name _;

    location / {
         try_files $uri $uri/ /index.php$is_args$args;
    }

    location ~ \.php$ {
        try_files $uri =404;
        fastcgi_split_path_info ^(.+\.php)(/.+)$;
        fastcgi_pass php:9000;
        fastcgi_index index.php;
        include fastcgi_params;
        fastcgi_param SCRIPT_FILENAME $document_root$fastcgi_script_name;
        fastcgi_param PATH_INFO $fastcgi_path_info;
    }

    location ^~ /geoserver/ {
        proxy_set_header X-Real-IP $remote_addr;
        proxy_set_header Host $http_host;
        proxy_set_header X-Forwarded-Proto http;
        proxy_set_header X-Forwarded-For $proxy_add_x_forwarded_for;
        proxy_pass http://geoserver:8080/geoserver/;
    }
}
In the docker-compose.yml file, we can now close the 8081 port opened in the Geoserver service; this service will only be accessible through the Nginx proxy on url http://localhost:8080/geoserver:
(...)
    geoserver:
        image: kartoza/geoserver:latest
        ports:
            - "8081:8080"
        volumes:
            - geoserver-data:/opt/geoserver/data_dir
        environment:
            GEOSERVER_DATA_DIR: /opt/geoserver/data_dir
            GEOSERVER_ADMIN_USER: admin
            GEOSERVER_ADMIN_PASSWORD: geoserver
        networks:
            - backend
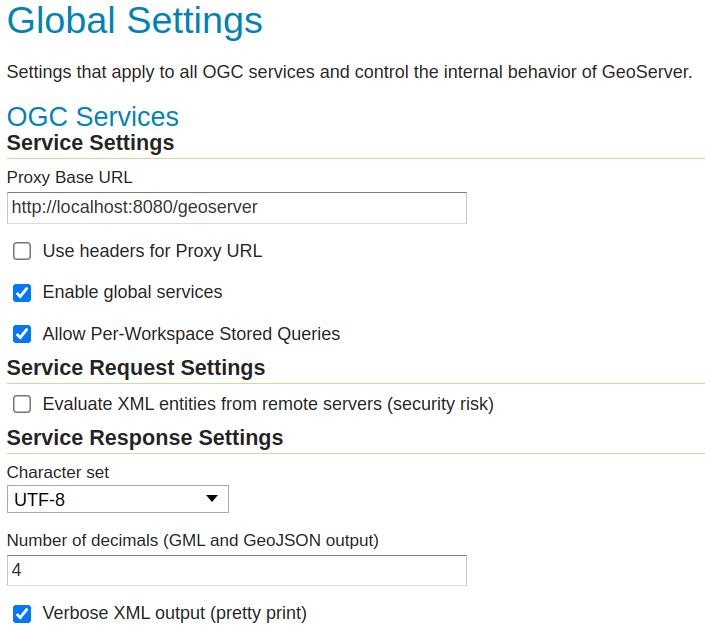
Now, run "docker-compose down" and "docker-compose up" again; the http://localhost:8081 Tomcat admin page should not be available anymore. We can directly connect to Geoserver through http://localhost:8080/geoserver. The final step is to tell Geoserver about our reverse proxy, so it knows how to generate proper urls. In the Geoserver administrative page, click on the "Global" link in the "Settings" section of the menu on the left and fill the "Proxy Base URL" with "http://localhost:8080/geoserver" then click save:
 Our proxy is now functional, let's try it in OpenLayers, in the resources/js/components/map.js, change the base WFS url like this:
(...)
                const paramsObj = {
                    servive: 'WFS',
                    version: '2.0.0',
                    request: 'GetFeature',
                    typeName: 'laravelgis:monuments',
                    outputFormat: 'application/json',
                    crs: 'EPSG:4326',
                    srsName: 'EPSG:4326',
                }

                const urlParams = new URLSearchParams(paramsObj)
                const monumentsUrl = 'http://localhost:8081/geoserver/wfs?' +  urlParams.toString()
                const monumentsUrl = 'http://localhost:8080/geoserver/wfs?' +  urlParams.toString()

                this.monumentsLayer = new VectorLayer({
                    source: new VectorSource({
                        format: new GeoJSON(),
                        url: monumentsUrl,
                    }),
                    style: this.styleFunction,
                    label: "Monuments",
                })
(...)
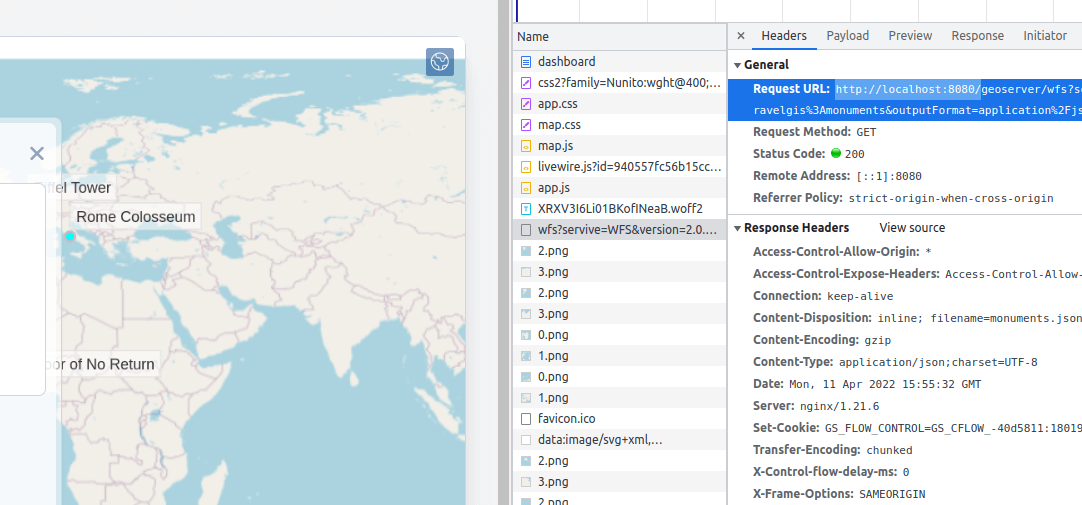
Let's run our watcher ("dr npm run dev") and go to http://localhost:8080/dashboard, we should still see our monuments on the map, but they are now loaded from the same origin as our application (http://localhost:8080) through the Nginx reverse proxy:
 We are now using a much better approach for using WFS on Geoserver. When we deploy to production, we can configure our Nginx with https with only one domain and one certificate for our Laravel application AND our Geoserver application. We now have a single point of entry to our web application.
Our backend is looking pretty good at this moment; in the next post, we will go back to the front end a little bit by refactoring our legend and adding a new interaction to the map: a popup that shows the name and picture when the user clicks on a monument. The popup is an overlay that will appear over the map at the location clicked by the user.
The commit for this post is available here: use-geoserver-through-nginx-reverse-proxy


Great explanation along the way my dear friend - written and by audio/video. My dev backend with reverse proxying works as a charm uptil now. I look forward to implement this three tier docker architecture on our GIS production environment soon - using $ArcGis$ now. But first off, I will just continue with the rest of the chapters (10 -16) in this dev environment. Keep on the good work.
Thank you for your kind comments, it's a great motivation to continue the project!